Your signature will appear here
Part 1:
- Fill in the required fields.
- Click "Generate Signature".
- Your signature must appear at the top right. Review your signature details to ensure everything is correct.
- Click "Copy Signature" to copy it to your clipboard.
Part 2: Gmail Signature Setup Guide
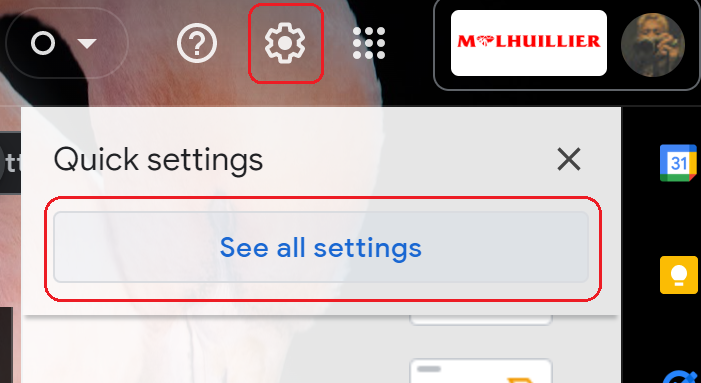
1. In the top-right corner of Gmail, click on the gear icon ⚙️ to open the Settings menu and select "See all settings" from the dropdown.
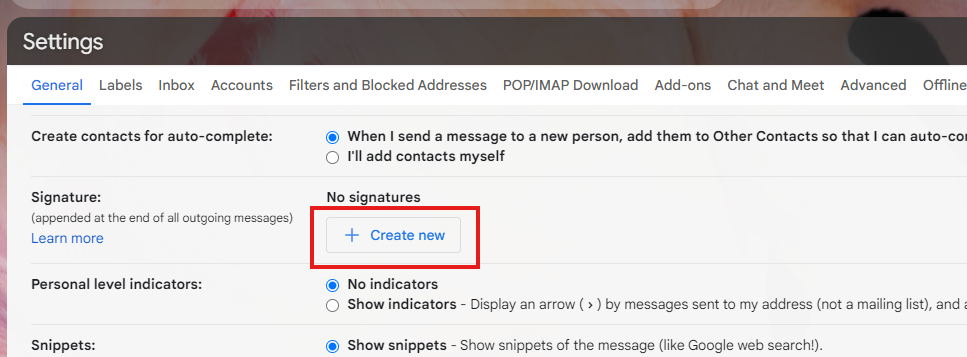
2. In the Settings menu, go to the "General" tab and scroll down until you find the "Signature" section.

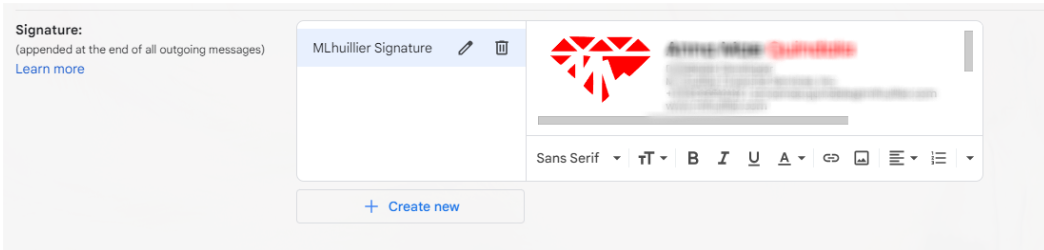
3. Click on “Create new” to add a new signature.
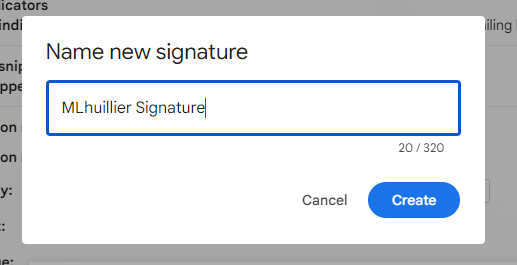
4. Name your signature (e.g., “MLhuillier Signature”).
5. Paste your copied signature into the text box (right-click then click Paste or press Ctrl + V on your keyboard)
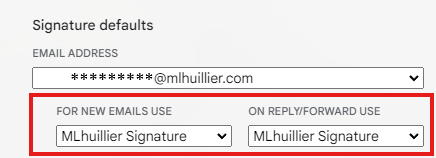
6. In the "Signature defaults" section, select your new signature for New emails and Reply/forward use if desired.
7. After setting up your signature, scroll down to the bottom of the settings page and click on the "Save Changes" button to apply your new signature.

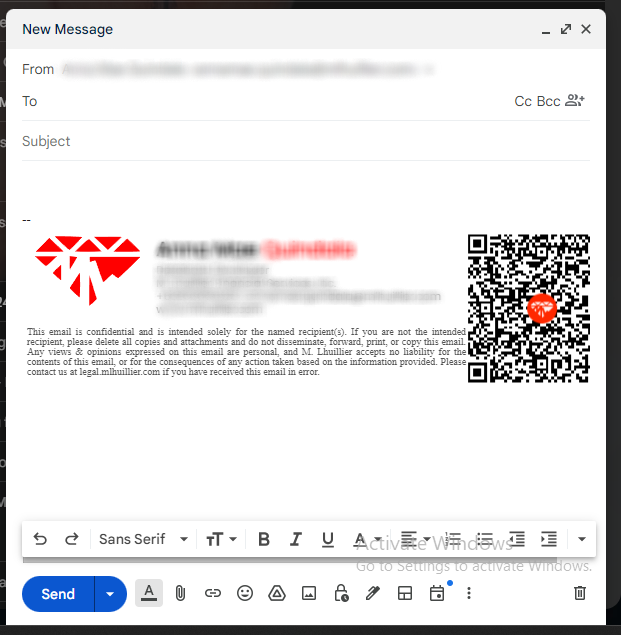
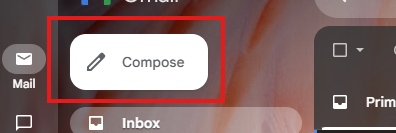
8. Test your signature by composing a new email.
9. Your new PNG signature should appear automatically at the bottom of the email.